
Some screen printing tips to help you along the way.
Stop Ink drying in your screen
Water based inks air dry and if you aren't printing constantly, areas can start to block and you start to lose detail especially with opaque inks. Some inks will dry quicker than others. Here is a good tip :
.png)
.png)
.png)
If you are printing and need to stop for a break or your screen is starting to lose detail due to ink drying in small detail or you have printed and pressed too hard and ink has smudged in places. Do a print stroke and clear the mesh of ink. Scoop excess ink off the front of the screen and return it to its container.
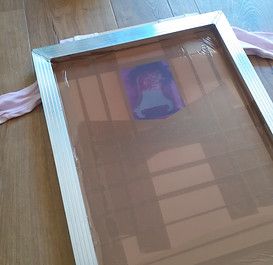
Ink in the mesh that will dry if you leave it for too long.
.png)
.png)
.png)
.png)
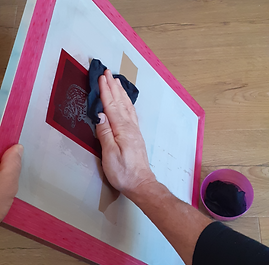
Now take a wet cloth, squeeze out the excess water and wipe the print side of your screen. Clean the parts with ink in them.
.png)
.png)
.png)
Then take a dry cloth and wipe the screen dry.
.png)
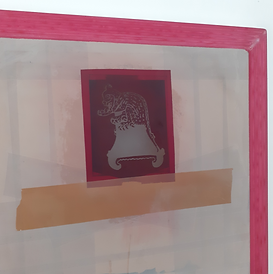
Hold the screen up to the light and look at the mesh, it should be clear of ink. Now you can take a break and get back to printing without any ink drying in your mesh. Make sure to get all of the water dried as it will have ink in it and if you print again these areas will transfer onto your fabric or paper.
The front of the screen can be inky but if you clean from the back you'll just clean the mesh which will keep it open for printing.
.png)
I had 10 boards set up and after doing 10 prints I would wipe my design/mesh part of my screen clean, dry it and then set it down and start drying the prints with a flash dryer or heat gun before printing the second colour. I found leaving a screen flooded with ink helped but not as much as wiping the mesh clear, especially when spending a few hours printing as over time little bits of ink dry in the mesh gradually causing blocked stencils which are difficult to clean.
Table adhesive (for fabric printing)
This was one of the first things that made a big difference to my printing. You print on your fabric, lift the screen and the fabric is stuck to the screen. You have to peel it off and things move and it's easy to get parts of your fabric touching other parts transferring ink. You also cannot do a second print if you didn't clear the ink properly on your print stroke.
Table Adhesive is applied to your printing board and keeps your fabric from moving which allows you to print a second print in the exact same position. Get some water based table adhesive in a tub don't use an aerosol one, they aren't as effective, are more expensive, they also aren't environmentally friendly and who needs to breath in adhesive ?
How to use Table Adhesive
Take your board that you are using for printing and make sure that it is completely clean. Now you need to take the table adhesive and wipe it over your board. People use rollers and other techniques. I would put adhesive around the board and then use a piece of cardboard to spread it evenly over the board. Don't use too much, put a few small blobs on and smooth them around, making sure to get all the way to the edges. Wait for it to dry and you'll find your board is really tacky - if you print straight away you might find your material sticks too much and you stretch your prints when you pull them off. I'd take an old t-shirt and flatten it onto the board, peel it off, turn the shirt around and stick the back down. Each time you do this fibres from the shirt stick to the table adhesive making it less sticky. After a few things have been stuck to the board it should be easier to work with. Now you can print, lift your screen and the fabric will be not move as it is stuck to the board, if you are using hinge clamps or some kind of jig you can return your screen to the exact same position and do a second print if necessary. This is a must if you want to get good opaque prints on dark fabrics. The first print needs dried before a second layer is printed making your print opaque enough to block out the background fabric colour.
After a while your board will become less sticky. You might find as you print the fabric starts to lift or the fabric is peeled off the board too easily. This is because lots of fibres are sticking to the adhesive on the board, simply take a wet cloth and wipe the board, take a couple of seconds and wipe it more, you will see the fibres and lint collecting and wiping off. Give the board a good wipe and it will become clear of fibres. Take a dry cloth and wipe the board dry. It still won't feel sticky but as it dries it will become just as sticky as when you started. You can use a hair dryer to speed this process up.
Make sure there are no threads or lumps stuck to your board as these will affect your print. You can after wiping the board clean, take a paint scraper or something flat like a ruler and skim over the surface of the board gently to remove anything that shouldn't be there, then dry the board.
You can purchase our Flat Fox Table Adhesive here.
Fixing holes in emulsion and stencils
Have some tippex nearby when you screen print. If you notice a pinhole in your emulsion or a mistake in your stencil, you can just dot the area or fix the mistake with tippex. It dries quickly and if you're printing with water based inks, when you clean the screen, the tippex won't come off with the water. You get Tippex with brushes which isn't great to apply compared to the Tippex pens with little nibs.